Tuesday, February 7, 2012

Masts: Part 4....

To All,
With some advice from herzogbrian I finished the masts and sails. This was a gigantic paint in the ass but is finally done.

I painted the masts the same way I painted the ships.( you can check the "Ships" posts for colors and steps) The sails were also looking pretty rough so I put them over a can and sprayed them with Clear matte. The matte spray will give the sails that 'full of wind" look::


Then, on the suggestion of herzogbrian, primed some small eye hooks black and screwed them into the masts. (make sure you drill a pilot hole or the dowel will split - I was warned, didn't listen, and learned the hard way) The eyelet was opened with needle-nose pliers:
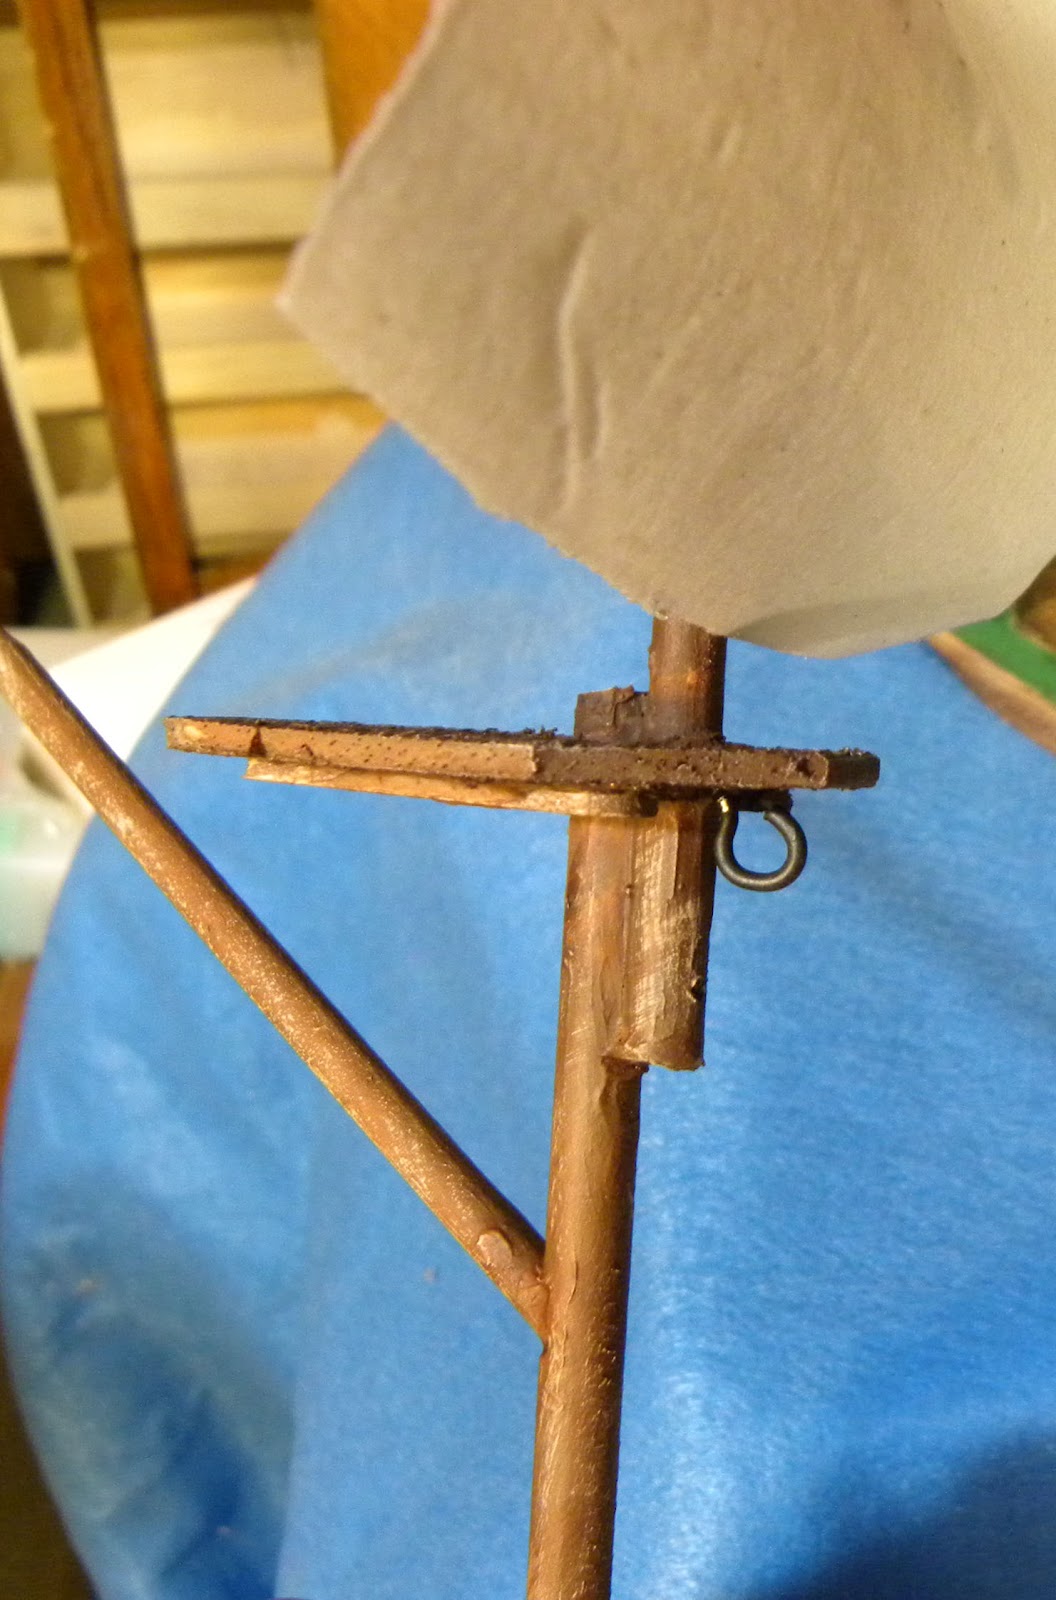
Then, after drilling a pilot hole, screwed another eyelet into the part that has the sail:


The result is that you can put on the lower sail to show a ship at full sail....

....or you can remove the lower sail for easier game play or to simulate a sail getting damaged during the battle:


Pretty smart.....

Monday, February 6, 2012

Cannon: Part 3....

To All,

Cannon finished!I must say that the quality of the sculpt and the casting on these cannon helped to get them done quickly. Not a lot of excess flashing and great detail.

Here is how the end came about.....

The truck were already primed brown:

Then I painted them Dark Chocolate. I may seem like a skirt for wearing the glove but it does keep the fingers and, more importantly, underneath the fingernails paint free. Anyone with a job where you deal with the public on a daily basis will understand:


A drybrush of Milk Chocolate:

Then a drybrush of Grey Gris. This looks too grey right now but wait for the wash:


The cannon are primed black:

The I used Army Painter Plate Mail primer. I did one pass on a 45-degree angle to keep some of the shadows.

Then the cannon are glued to the trucks with ZapGap and the raised lines and details hit with GW Dwarf Bronze. At this point it looks very shiny until.....

....a liberal wash of Badab Black is applied. It tones down the "shiny" and fills in the detail:

Here are all three steps - the right is Army Painter + the Dwarf bronze, the middle is the wet Badab Black, and to the left is the dry, completed cannon:
Here are the 25 Brigade Games cannon finished.


Let me know what you think.

Sunday, February 5, 2012

A Unit Sized Tunneler....

To All,

From the mind of herzogbrian - a tunneler for your whole unit:


I'll have to check the rules on this one....

Saturday, February 4, 2012

The Sloop: Part 2....

To All,

herzogbrian continues his work.......

New figurehead in place. Greenstuffed the gaps and replaced/added back the details destroyed when the old figurehead was removed:


All primed and ready to paint:
More as it comes in.....

Thursday, February 2, 2012

The Sloop: Part 1....

To All,

Here is a treat for you -  Brian Robinette, aka herzogbrian, has agreed to put together and paint up an Old Glory Sloop for the game at Cold Wars. herzogbrian is a terrific modeler and painter ( I will post pictures of his "Chocolate Swiss"  - Gnome Wars Swiss figures that he converted and painted - the best themed unit I have ever seen - I still laugh when I see the pictures) and I was thrilled when he offered to do the ship.

I asked him if he would mind putting together some posts to give you guys the step-by-step of someone who actually knows what they are doing. The maroon words are the captions that herzogbrian emailed me:

The Kit Jim sent:

Glued bulkhead and filled major air bubbles:

Added magnets so quarterdeck could be removed as needed:


Added railing from some bitz I had from the OG Adventure Brig:
Drill step for Bowsprit:

Hit the figurehead with a black wash so that you can see the level of muddy detail that was there.  I would like to have seen one of the first few casts of this boat because I think that the mermaid might have been quite nice, but by the time this model was cast, the figurehead was a blob:

The replacement figurehead... Reaper's Dark Maiden item#14106:

The old figurehead cut away and sized up for the new one to be installed:

Awesome - I will post more as it comes in......

Tuesday, January 31, 2012

Cannon: Part 2....

To All,

Thanks to Student Teacher I have been looking at the ends of the cannon and thinking, "a black dot on the end of this is really going to look crappy." So I have resigned myself to drilling out the ends.(Maybe some people should keep their comments to themselves.)

Anyway, here it is:
I used the 1/16" bit from my DREMEL set..

....and put it into my drill. I have found that I get a great result if I just set the drill on the bench and bring the cannon to it....


....once it is centered I drill it for roughly 5 seconds....

..and end up with a good result.
I will be painting these up tonight and posting tomorrow.
Here is where to order the cannon at Brigade Games:

Monday, January 30, 2012

Half-hour Boat: Part 2....

To All,

Part 2 of the Colonial River Gunboat:

I brought the pieces to the workbench. I peeled the blue tape from the bottom of the hull. The line between the red and grey was perfect.


Here is a shot of the hull. It actually looks pretty good.

I used black wash on the decking on the hull and on the top deck to bring out some detail on the boards:


I watered down some Antique White and washed the covering on the top deck. In this picture you can also see the black wash on the deck - these three steps took roughly 10 minutes.
Here is the Colonial River Boat put together. You can see the smoke stack here.


Not bad for around 30 minutes of work. Let me know what you think.....